MCP3421DM-BFG Microchip Technology, MCP3421DM-BFG Datasheet - Page 15
MCP3421DM-BFG
Manufacturer Part Number
MCP3421DM-BFG
Description
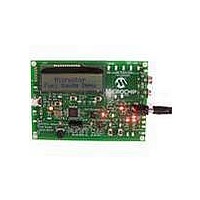
BOARD DEMO FOR MCP3421
Manufacturer
Microchip Technology
Datasheets
1.MCP3421A2T-ECH.pdf
(42 pages)
2.MCP3421DM-BFG.pdf
(26 pages)
3.MCP3421A0T-ECH.pdf
(30 pages)
Specifications of MCP3421DM-BFG
Main Purpose
Power Management, Battery Gauge
Utilized Ic / Part
MCP3421
Processor To Be Evaluated
MCP3421
Lead Free Status / RoHS Status
Lead free / RoHS Compliant
Secondary Attributes
-
Embedded
-
Primary Attributes
-
Lead Free Status / RoHS Status
Lead free / RoHS Compliant, Lead free / RoHS Compliant


2.2
© 2007 Microchip Technology Inc.
GETTING STARTED
You can simulate battery voltage discharging and charging using the MCP3421 Battery
Fuel Gauge Demo Board.
Battery Fuel Measurement Mode: The MCP3421 Battery Fuel Gauge Demo Board
measures the currents coming from the battery every second and computes how many
fuels are being used. The fuel is calculated from the time when the MCP3421 Battery
Fuel Gauge Demo Board is powered and the fuel measurement is initiated. When JP1
jumper is connected, a battery discharging path from the battery to the current sensor
to the 100Ω resistor (R11) to ground is created. This simulates how battery fuel is
consumed in real applications. The differential input pins of U1 (ADC) are connected
across the current sensor and measure the current passing through the current sensor.
The ADC can determine whether the measured current is discharging current or charg-
ing current by testing the sign of the current value. In the battery discharging path, the
direction of current flow is from the battery to the ground through R12 and R11. There-
fore, the LCD will display a positive sign (‘ + ‘) on the display.
2.2.1
The battery fuel being used is measured by setting up a discharge path. This discharge
path is created when connecting Jumper 1 (JP1) while disconnecting Jumper 2 (JP2).
1. Connect JP1.
2. Connect a 9V power supply to J1, or connect a 9V battery to TP11.
There are two 9V connections. You can use either 9V battery or 9V power supply. Only
one power source is used.
3. The LED D3 will turn on, and the LCD will display the following message:
4. A few seconds later, the LCD will display the following message:
5. Press S1. The LCD will display the following message:
Note:
If the 1.5V battery is disconnected, connect the positive lead (red) of the 1.5V
battery holder to the TP9 terminal and the negative lead (black) to the GND ter-
minal. Make sure the 1.5V AAA battery is correctly inserted into the battery
holder. Press the S1 push button.
Battery Fuel Measurement
Make sure JP2 is not connected.
Draft
ConntJP1, Push S1
Connect 1.5V Bat
Fuel Gauge Demo
at TP9. Press S1
Disconnect JP2
Microchip
DS51683A-page 11
Related parts for MCP3421DM-BFG
Image
Part Number
Description
Manufacturer
Datasheet
Request
R

Part Number:
Description:
18-Bit Analog-to-Digital Converter with I2C Interface and On-Board Reference
Manufacturer:
Microchip Technology
Datasheet:

Part Number:
Description:
Manufacturer:
Microchip Technology Inc.
Datasheet:
Part Number:
Description:
Manufacturer:
Microchip Technology Inc.
Datasheet:
Part Number:
Description:
Manufacturer:
Microchip Technology Inc.
Datasheet:
Part Number:
Description:
Manufacturer:
Microchip Technology Inc.
Datasheet:
Part Number:
Description:
Manufacturer:
Microchip Technology Inc.
Datasheet:
Part Number:
Description:
Manufacturer:
Microchip Technology Inc.
Datasheet:
Part Number:
Description:
Manufacturer:
Microchip Technology Inc.
Datasheet:
Part Number:
Description:
Manufacturer:
Microchip Technology Inc.
Datasheet: