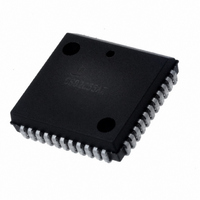
CS82C55AZ Intersil, CS82C55AZ Datasheet - Page 26

CS82C55AZ
Manufacturer Part Number
CS82C55AZ
Description
IC I/O EXPANDER 24B 44PLCC
Manufacturer
Intersil
Type
Programmable Peripheral Interfacer
Specifications of CS82C55AZ
Interface
Programmable
Number Of I /o
24
Interrupt Output
No
Voltage - Supply
4.5 V ~ 5.5 V
Operating Temperature
0°C ~ 70°C
Mounting Type
Surface Mount
Package / Case
44-PLCC
Chip Configuration
8 Bit
Bus Frequency
8MHz
No. Of I/o's
24
Supply Voltage Range
4.5V To 5.5V
Digital Ic Case Style
LCC
No. Of Pins
44
Msl
MSL 3 - 168 Hours
Filter Terminals
SMD
Rohs Compliant
Yes
Lead Free Status / RoHS Status
Lead free / RoHS Compliant
Frequency - Clock
-
Lead Free Status / Rohs Status
RoHS Compliant part
Available stocks
Company
Part Number
Manufacturer
Quantity
Price
Company:
Part Number:
CS82C55AZ
Manufacturer:
Intersil
Quantity:
5 009
Company:
Part Number:
CS82C55AZ
Manufacturer:
Intersil
Quantity:
800
Company:
Part Number:
CS82C55AZ96
Manufacturer:
Intersil
Quantity:
4 000
Company:
Part Number:
CS82C55AZ96
Manufacturer:
Intersil
Quantity:
14 600
Part Number:
CS82C55AZ96
Manufacturer:
INTERSIL
Quantity:
20 000
SEATING
Ceramic Dual-In-Line Frit Seal Packages (CERDIP)
NOTES:
10. Controlling dimension: INCH.
PLANE
PLANE
1. Index area: A notch or a pin one identification mark shall be locat-
2. The maximum limits of lead dimensions b and c or M shall be
3. Dimensions b1 and c1 apply to lead base metal only. Dimension
4. Corner leads (1, N, N/2, and N/2+1) may be configured with a
5. This dimension allows for off-center lid, meniscus, and glass
6. Dimension Q shall be measured from the seating plane to the
7. Measure dimension S1 at all four corners.
8. N is the maximum number of terminal positions.
9. Dimensioning and tolerancing per ANSI Y14.5M - 1982.
BASE
ccc
S1
b2
ed adjacent to pin one and shall be located within the shaded
area shown. The manufacturer’s identification shall not be used
as a pin one identification mark.
measured at the centroid of the finished lead surfaces, when
solder dip or tin plate lead finish is applied.
M applies to lead plating and finish thickness.
partial lead paddle. For this configuration dimension b3 replaces
dimension b2.
overrun.
base plane.
M
C A - B
b
bbb
S
S
C A - B
D
A
-A-
-B-
A
D
e
S
S
26
D
-C-
S
-D-
E
Q
aaa
A
L
M
M
c1
e
A/2
C A - B
SECTION A-A
LEAD FINISH
METAL
BASE
(b)
b1
α
S
M
e
A
c
D
S
(c)
82C55A
F40.6
40 LEAD CERAMIC DUAL-IN-LINE FRIT SEAL PACKAGE
SYMBOL
eA/2
aaa
bbb
ccc
eA
S1
b1
b2
b3
c1
Q
M
A
D
E
α
N
b
c
e
L
MIL-STD-1835 GDIP1-T40 (D-5, CONFIGURATION A)
0.014
0.014
0.045
0.023
0.008
0.008
0.510
0.125
0.015
0.005
MIN
90
-
-
-
-
-
-
0.100 BSC
0.600 BSC
0.300 BSC
o
INCHES
40
0.225
0.026
0.023
0.065
0.045
0.018
0.015
2.096
0.620
0.200
0.070
0.015
0.030
0.010
0.0015
MAX
105
-
o
12.95
0.36
0.36
1.14
0.58
0.20
0.20
3.18
0.38
0.13
MIN
MILLIMETERS
90
-
-
-
-
-
-
15.24 BSC
o
2.54 BSC
7.62 BSC
40
53.24
15.75
5.72
0.66
0.58
1.65
1.14
0.46
0.38
5.08
1.78
0.38
0.76
0.25
0.038
MAX
105
-
November 16, 2006
o
Rev. 0 4/94
NOTES
FN2969.10
2, 3
2
3
4
2
3
5
5
6
7
8
-
-
-
-
-
-
-
-
-
-


