PIC32MX320F128LT-80I/BG Microchip Technology, PIC32MX320F128LT-80I/BG Datasheet - Page 36
PIC32MX320F128LT-80I/BG
Manufacturer Part Number
PIC32MX320F128LT-80I/BG
Description
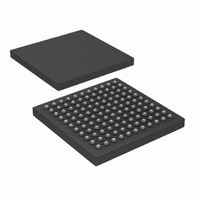
128 KB Flash, 32 KB RAM, 80 MHz, 10-Bit ADC 121 XBGA 10x10x1.20mm T/R
Manufacturer
Microchip Technology
Series
PIC® 32MXr
Datasheets
1.MA320002.pdf
(208 pages)
2.DM320001.pdf
(44 pages)
3.PIC32MX320F032H-40IPT.pdf
(48 pages)
4.PIC32MX320F032H-40IPT.pdf
(66 pages)
5.PIC32MX320F032H-40IPT.pdf
(22 pages)
Specifications of PIC32MX320F128LT-80I/BG
Core Processor
MIPS32® M4K™
Core Size
32-Bit
Speed
80MHz
Connectivity
I²C, IrDA, LIN, PMP, SPI, UART/USART
Peripherals
Brown-out Detect/Reset, POR, PWM, WDT
Program Memory Size
128KB (128K x 8)
Program Memory Type
FLASH
Ram Size
16K x 8
Voltage - Supply (vcc/vdd)
2.3 V ~ 3.6 V
Data Converters
A/D 16x10b
Oscillator Type
Internal
Operating Temperature
-40°C ~ 85°C
Package / Case
121-TFBGA
Processor Series
PIC32MX3xx
Core
MIPS
3rd Party Development Tools
52713-733, 52714-737
Development Tools By Supplier
PG164130, DV164035, DV244005, DV164005, DM320001, DM320002, MA320001
Lead Free Status / RoHS Status
Lead free / RoHS Compliant
Number Of I /o
-
Eeprom Size
-
Lead Free Status / Rohs Status
Details
Available stocks
Company
Part Number
Manufacturer
Quantity
Price
Company:

Part Number:
PIC32MX320F128LT-80I/BG
Manufacturer:
Microchip Technology
Quantity:
10 000


5.11
5.12
DS61146B-page 32
BUILDING THE PROJECT
TESTING THE CODE
From the Project menu, we can compile and link the current files.
To build the project, select either:
The Output window shows the result of the build process. There should be no errors
on any step.
FIGURE 5-12:
First download the hex image of the program we just built by selecting Debugger->Pro-
gram from the Debugger menu or directly program from the “Debug Toolbar”. The
programming operation should occur with no errors.
In order to test our example application, we need to set-up the PC part too.
Connect a serial cable between the board RS-232 connector and one of the PC’s COM
ports and open a Hyper Terminal application on the PC (Programs->Accesso-
ries->Communications->Hyper Terminal).
Select a proper name for this connection, click OK and then, in the “Connect To” screen
select the COM port that’s connected to the development board.
- Project>Build All
- Right click on the project name in the project window and select Build All
- Click the Build All icon on the Project toolbar. Hover the mouse over icons to
see pop-up text of what they represent.
MPLAB IDE PROJECT BUILD
© 2008 Microchip Technology Inc.
Related parts for PIC32MX320F128LT-80I/BG
Image
Part Number
Description
Manufacturer
Datasheet
Request
R

Part Number:
Description:
Manufacturer:
Microchip Technology Inc.
Datasheet:
Part Number:
Description:
Manufacturer:
Microchip Technology Inc.
Datasheet:
Part Number:
Description:
Manufacturer:
Microchip Technology Inc.
Datasheet:
Part Number:
Description:
Manufacturer:
Microchip Technology Inc.
Datasheet:
Part Number:
Description:
Manufacturer:
Microchip Technology Inc.
Datasheet:
Part Number:
Description:
Manufacturer:
Microchip Technology Inc.
Datasheet:
Part Number:
Description:
Manufacturer:
Microchip Technology Inc.
Datasheet:
Part Number:
Description:
Manufacturer:
Microchip Technology Inc.
Datasheet: