LE-2 IDEC, LE-2 Datasheet - Page 15
LE-2
Manufacturer Part Number
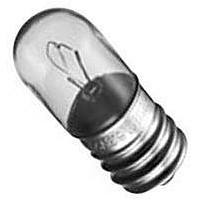
LE-2
Description
LAMP, INCANDESCENT, E12/15, 2W
Manufacturer
IDEC
Datasheet
1.SLC40N-0604-DD2FB.pdf
(16 pages)
Specifications of LE-2
Supply Voltage
24V
Base Type
E12/15
Bulb Size
13mm
Power Rating
2W
Lead Free Status / RoHS Status
Lead free / RoHS Compliant


Display Lights
Removing Windows
SLC30: To remove a window, insert the tip of a small screwdriver into the slot
under the lens frame and gently press down on the screwdriver.
SLC40: To remove an extended window,
pull on the top as if to extend the unit;
then continue pulling until the unit comes
out of the housing. All units are shipped
with windows retracted. When transport-
ing units, make sure windows are pushed
in fully. After windows are installed, they
can be extended as shown in Figure 1.
Removing Lens, Color Screen, and Marking Plate
The lens has two retaining projections on
the right and two on the left. To remove
the lens, color screen, and marking plate
from the lens frame, push open the lens
frame with both hands as shown in
Figure 2.
The lens can also be removed by inserting
a screwdriver into one of the sides with
recesses. Since the lens has an orienta-
tion, be sure to insert the screwdriver in
the direction shown in Figures 3 and 4.
Figure 5: SLC30 and SLC40
Clearwater Tech - Phone: 800.894.0412 - Fax: 208.368.0415 - Web: www.clrwtr.com - Email: info@clrwtr.com
Lens Frame
Color Screen
Marking Plate
Figure 1: SLC40
Figure 2: SLC30 and SLC40
Lens
Installing Lens, Color
Screen, and Marking
Plate
First, install the marking
plate and color screen into
the lens frame. To install
the lens, insert its retain-
ing projections into the
recesses inside the lens
USA: 800-262-IDEC
Installation Instructions, continued
Figure 3:
SLC30
Figure 4:
SLC40
Canada: 888-317-IDEC
frame, and press the lens into the lens frame as shown in Figure 5.
Installation
Figure 8: SLC40
721
Related parts for LE-2
Image
Part Number
Description
Manufacturer
Datasheet
Request
R

Part Number:
Description:
LAMP, INCANDESCENT, E12/15, 30V, 2W
Manufacturer:
IDEC
Datasheet:

Part Number:
Description:
Cable; Between IDEC MicroSmart (port 1 or 2) and HG2F/3F/4F; 5 ft.
Manufacturer:
IDEC Corporation
Datasheet:
Part Number:
Description:
Cable; Between IDEC Micro^3C/ONC/MicroSmart (port 2) PLCs and HG2F/3F/4F; 5 ft.
Manufacturer:
IDEC Corporation
Datasheet:
Part Number:
Description:
Angled Key for Idec HS6B Safety Switch
Manufacturer:
IDEC Corporation
Datasheet:
Part Number:
Description:
Accessory, L-Shaped Key for Idec HS5B and HS5E Safety Switch
Manufacturer:
IDEC Corporation
Datasheet:
Part Number:
Description:
Accessory, Straight Key for Idec HS5B and HS5E Safety Switch
Manufacturer:
IDEC Corporation
Datasheet:
Part Number:
Description:
Straight Key for Idec HS6B Safety Switch
Manufacturer:
IDEC Corporation
Datasheet:
Part Number:
Description:
LIGHT TOWER 3 TIER RED/AMBER/GREEN 24VAC/DC WALL MOUNT
Manufacturer:
IDEC Corporation
Datasheet:
Part Number:
Description:
Flat Lens, 24V AC/DC, 1m Cable Length, Alternate: Red Green Color, IP67
Manufacturer:
IDEC Corporation
Datasheet: