T528LS2W ETERNA, T528LS2W Datasheet - Page 2
T528LS2W
Manufacturer Part Number
T528LS2W
Description
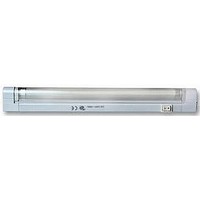
FLUORESCENT FITTING, T5 LINK, 1200MM
Manufacturer
ETERNA
Datasheet
1.T528LS2W.pdf
(2 pages)
Specifications of T528LS2W
Supply Voltage
230V
Base Type
1150mm T5 Fluorescent 28W
Power Rating
28W
Length
1200mm
Svhc
No SVHC (15-Dec-2010)
Colour
White
External Length / Height
1200mm
External Width
21mm
Lamp Base Type
1150mm T5 Fluorescent 28W
Depth
55mm


Read this first:
>
>
>
>
>
>
>
>
>
>
>
Warning:
The leads supplied with your light fitting and the sockets incorporated in your fitting are designed to give
protection against any possible electrical hazard. The mains lead is terminated in a socket marked NLS and
this lead should be used to supply mains to your fitting or chain of fittings. Under no circumstances should
you attempt to adapt the link lead to supply power to the opposite end of your fitting as this will leave live
pins exposed at the mains input end of the fitting. Altering or adapting any of the leads, other than
shortening the mains supply lead, will invalidate your guarantee and could present a severe electrical shock
hazard.
Safety markings:
This light fitting must be installed in
accordance with the Building Regulations.
These may be obtained from HMSO or viewed
and
following the link for Building Regulations.
If in any doubt, consult a qualified
electrician.
Switch off the mains before commencing
installation and remove the appropriate circuit
fuse.
Disconnect the fitting from the electrical supply
before flash or high voltage testing.
Do not connect to a circuit which also has
inductive loads connected as spikes generated
switching
electronic components within your fitting.
Suitable for indoor use only.
This product is suitable for installation on
surfaces with normal flammability ( indicated by
the "F" in a triangle ) e.g. wood, plasterboard,
masonry. It is not suitable for use on highly
flammable surfaces ( e.g. polystyrene, textiles ).
Before making fixing hole(s), check that there
are no obstructions hidden beneath the
mounting surface such as pipes or cables.
Do not attach to surfaces which are damp,
freshly
conductive (e.g. metallic surfaces).
If the location of your new fitting requires the
provision of a new electrical supply, the supply
must conform with the requirements of the
Building Regulations.
This product is designed for permanent
connection to fixed wiring: this should be either
a suitable lighting circuit ( protected with a 5 or 6
Amp MCB or fuse ) or a fused spur ( with a 3
Amp fuse ) via a fused connection unit. We
downloaded
painted
inductive
or
from
loads
otherwise
www.odpm.gov.uk
may
electrically
damage
>
>
>
Installation:
1)
2)
3)
4)
5)
6)
7)
recommend that the supply incorporates a
switch for ease of operation.
Make connections to the electrical supply in
accordance with the following code:
This fitting is double insulated, do not connect
any part to earth.
You are advised at every stage of your
installation to double-check any electrical
connections you have made. After you have
completed your installation there are electrical
tests that should be carried out: these tests are
specified in the Wiring Regulations ( BS7671 )
referred to in the Building Regulations. If in
doubt, consult a qualified electrician.
When positioning the fitting, make sure there is
a gap of at least 10mm between the lamp and
any adjacent surface. See figure 1, opposite.
Select the type of brackets you need to use and
mark off the fixing points. If fixing to a shelf or
under a cupboard, check the screw size
required and screw into place. See figures 2 and
3, opposite.
If fixing directly to the wall, drill holes using a N°
5 / 8mm drill bit to a depth of 30mm and insert
wall plugs.
Secure the selected brackets in place using the
screws supplied.
Attach the fitting to the clips.
Connect the mains lead or link lead to the
socket on your fitting.
Restore the power supply and switch on.
Live - Brown or Red
Neutral - Blue or Black
How to link multiple fittings together.
Option 1. The light fittings can be butted together to form a line of up to a maximum of 6 fittings. Simply
remove the connector caps and push the fittings together.
Use the mains lead cable to connect the first fitting and the mains via a
spur or junction box.
Option 2. Connect link leads between each fitting and once all lights have
been connected, connect the mains lead to the mains via a spur or junction
box.
Option 3. For more than one unlinked
light, use a socket block ( available
as an optional extra ) and simply
plug the 13A plug into your
End view
1
End view
10mm gap
Fixing clip
3
10mm gap
Fixing clip
End view
End view
Fixing clips
“C” mounting clip
“F” mounting clip
2
Related parts for T528LS2W
Image
Part Number
Description
Manufacturer
Datasheet
Request
R

Part Number:
Description:
LIGHT FITTING, CEILING, SLIM, 16W
Manufacturer:
ETERNA
Datasheet:

Part Number:
Description:
TRANSFORMER, 12V, 105VA, 5WAY
Manufacturer:
ETERNA
Datasheet:

Part Number:
Description:
PHOTOCELL, MINIATURE, REMOTE FIXING
Manufacturer:
ETERNA
Datasheet:

Part Number:
Description:
PHOTOCELL, NEMA, SOCKET
Manufacturer:
ETERNA
Datasheet:

Part Number:
Description:
PHOTOCELL, NEMA SOCKET KIT
Manufacturer:
ETERNA
Datasheet:

Part Number:
Description:
PHOTOCELL, WITH TIMER
Manufacturer:
ETERNA
Datasheet:

Part Number:
Description:
SWITCH, LIGHTING, AUTO
Manufacturer:
ETERNA
Datasheet:

Part Number:
Description:
PHOTOCELL, MINIATURE
Manufacturer:
ETERNA
Datasheet:


Part Number:
Description:
BRICK LIGHT, FRAMED
Manufacturer:
ETERNA
Datasheet:


Part Number:
Description:
BULKHEAD, GREY
Manufacturer:
ETERNA
Datasheet:

Part Number:
Description:
BULKHEAD, CORNER, BLK
Manufacturer:
ETERNA
Datasheet:
Part Number:
Description:
TRANSFORMER, 12V, 105VA, 5WAY
Manufacturer:
ETERNA
Datasheet: