EE-SX460-P1 Omron, EE-SX460-P1 Datasheet - Page 2
EE-SX460-P1
Manufacturer Part Number
EE-SX460-P1
Description
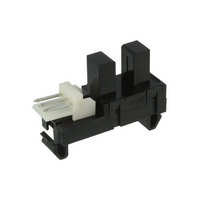
PHOTO MICROSENSOR
Manufacturer
Omron
Datasheet
1.EE-SX460-P1.pdf
(2 pages)
Specifications of EE-SX460-P1
Sensing Distance
0.197" (5mm)
Sensing Method
Transmissive
Output Configuration
NPN - Open Collector/Light-ON
Mounting Type
Snap-In
Current - Supply
30mA
Voltage - Supply
10V
Package / Case
Module, Connector
Aperture Width
0.5 mm
Termination Style
PCB
Lead Free Status / RoHS Status
Lead free / RoHS Compliant
Response Time
-
Lead Free Status / Rohs Status
Lead free / RoHS Compliant
Other names
EE-SX460-P1
EESX460P1
OR1002
EESX460P1
OR1002
Available stocks
Company
Part Number
Manufacturer
Quantity
Price
Company:

Part Number:
EE-SX460-P1
Manufacturer:
OmRon
Quantity:
20
Company:
Part Number:
EE-SX460-P12
Manufacturer:
HONEYWELL
Quantity:
1 720
Company:
Part Number:
EE-SX460-P16
Manufacturer:
OmRon
Quantity:
4 200


■ Engineering Data
■ Recommended Mounting Hole Dimensions and Mounting and Dismounting Method
The Photomicrosensor can be mounted to 0.8- to 1.6-mm-thick
panels.
Refer to the above mounting hole dimensions and open the
mounting holes in the panel to which the Photomicrosensor will be
mounted.
Insert into the holes the Photomicrosensor’s mounting portions with
a force of three to five kilograms but do not press in the
Photomicrosensor at one time. The Photomicrosensor can be easily
mounted by inserting the mounting portions halfway and then slowly
pressing the Photomicrosensor onto the panel.
There are two ways to dismount the Photomicrosensor. Refer to the
following.
Dismounting with Screwdriver
Press the mounting hooks of the Photomicrosensor with a flat-blade
screwdriver as shown in the following illustration and pull up the
Photomicrosensor.
Output Allowable Dissipation vs.
Ambient Temperature Characteristics
EE-1005 Connector
1
2
3
No.
Receptacle
housing
Receptacle
contact
Lead wire
(1) (2)
Sensor edge
Name
Ambient temperature Ta ( C)
Mounting hook
Flat-blade
screwdriver
(1)
171822-3
170262-1
UL1007 AWG24
Center of sensing
slot
(2)
Model
Panel
EE-SX460-P1
3
1
3
Quantity
Sensor edge on
connector side
Mounting hook
(2)
1,000 20
Flat-blade
screwdriver
(1)
(3)
Sensing Position Characteristics
(Typical)
Optical axis
Tyco Electronics
AMP
Tyco Electronics
AMP
---
Maker
d
1
= 0 0.3 mm
EE-SX460-P1
Distance d (mm)
Wiring
Dismounting by Hand
Squeeze the mounting tabs as shown in the following illustration and
press the mounting tabs upwards.
Pressed mounting holes are ideal for mounting the
Photomicrosensor. When mounting the Photomicrosensor to a panel
that has pressed mounting holes for the Photomicrosensor, be sure
to mount the Photomicrosensor on the pressing side of the panel,
otherwise it may be difficult to mount the Photomicrosensor and an
insertion force of five to six kilograms may be required.
When mounting the Photomicrosensor to a panel that has mounting
holes opened by pressing, make sure that the mounting holes have
no burrs, otherwise the lock mechanism of the Photomicrosensor
will not work perfectly. After mounting the Photomicrosensor to a
panel, be sure to check if the lock mechanism is working perfectly.
1
2
3
Center of optical axis
Connector
circuit no.
V
Ta = 25 C
R
CC
L
= 47 k
= 5 V
This tapered portion must be on
the lower side of the panel, other
wise the Photomicrosensor will
not be locked in.
Photomicrosensor (Transmissive)
Red
Orange
Yellow
Lead wire color
Sensing Position Characteristics
(Typical)
OFF
Panel
ON
3
d
2
= 0 1.1 mm
2
V
Ta = 25 C
R
CC
L
= 47 k
Distance d (mm)
= 5 V
1
Mounting tab
Panel
V
OUT
GND
Output when connected to
(1)
EE-SX460-P1
CC
0
(2)
EE-SX460-P1
d
1
EE-SX460-P1
(1)
d
2
2
3
145
Related parts for EE-SX460-P1
Image
Part Number
Description
Manufacturer
Datasheet
Request
R

Part Number:
Description:
PHOTOMICROSENSOR, TRANSISTOR
Manufacturer:
Omron
Datasheet:

Part Number:
Description:
PHOTO MICROSENSOR
Manufacturer:
Omron
Datasheet:

Part Number:
Description:
OPTO SENSOR 8MM WIDE SLOT TYPE
Manufacturer:
Omron
Datasheet:

Part Number:
Description:
OPTO SENSOR SLOT TYPE 5MM
Manufacturer:
Omron
Datasheet:

Part Number:
Description:
OPTO SENSOR SLOT TYPE 5MM
Manufacturer:
Omron
Datasheet:

Part Number:
Description:
OPTO SENSOR SLOT TYPE 5MM
Manufacturer:
Omron
Datasheet:

Part Number:
Description:
Optical Sensor (Switch) Transmissive / Slotted Interrupter
Manufacturer:
Omron
Datasheet:

Part Number:
Description:
PHOTOMICROSENSOR, TRANSISTOR
Manufacturer:
Omron
Datasheet:

Part Number:
Description:
SENSR OPTO SLOT 3.4MM TRANS THRU
Manufacturer:
Omron
Datasheet:

Part Number:
Description:
OPTO SENSOR SLOT TYPE 3MM
Manufacturer:
Omron
Datasheet:


Part Number:
Description:
PHOTO MICROSENSOR
Manufacturer:
Omron
Datasheet:

Part Number:
Description:
PHOTO MICROSENSOR :
Manufacturer:
Omron
Datasheet:
Part Number:
Description:
PHOTO MICROSENSOR
Manufacturer:
Omron
Datasheet:
Part Number:
Description:
PHOTO MICROSENSOR
Manufacturer:
Omron
Datasheet: