AZ40029 PANASONIC EW, AZ40029 Datasheet - Page 6
AZ40029
Manufacturer Part Number
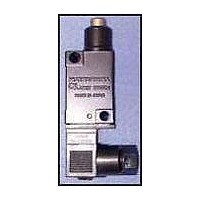
AZ40029
Description
LIMIT SWITCH, ROLLER PLUNGER, SPDT
Manufacturer
PANASONIC EW
Datasheet
1.AZ46079.pdf
(21 pages)
Specifications of AZ40029
Actuator Style
Roller Plunger
Operating Force Max
6.86N
Contact Voltage Ac Max
250V
Contact Voltage Dc Max
125V
Contact Current Ac Max
5A
Contact Current Dc Max
5A


QL (AZ4)
MOUNTING METHOD
1. L socket type
1) After loosening the L socket fastening
screws, grasp the terminal cover and pull
it away from the switch body.
2) Remove the fastening screw from the
42
terminal block. (Remove with the 3 termi-
nal receptacle.)
3) Loosen the hexagonal nut and
remove the rubber bushing and washer
from the inside.
4) Select cord from applicable wire table.
5) Decide which direction the cord outlet
is to face and strip the sheath according-
ly. (See page 43.)
6) After passing the applicable cord
through the hexagonal nut, bushing, and
washer in that order, pass the cord
through the terminal case.
7) After stripping the cord sheath, insert
the corresponding wires into the grooves
of the terminal body up to the wire stop,
then crimp the terminal receptacle over
the wires with a pair of pliers.
Pull away from the body.
Turn counterclockwise.
Terminal receptacle
Terminal body connection diagram
Terminal receptacle
Turn counterclockwise.
Terminal body
Lead wire
Lead wire stop
8) After the terminals have been properly
crimped in the terminal body, insert the
body into the terminal case. (When
inserting the body, be careful not to block
the hole for the fastening screw with the
wires.)
9) Temporarily screw in the fastening
screw through the terminal body, then
insert the washer and rubber bushing
into the cord opening of L socket.
Tighten it with a wrench or pliers.
10) Apply the rubber packing over the
terminals, then insert the L socket into
the switch body.
11) Tighten the fastening screw into the
switch body.
Clockwise direction
2. Socket with cord (including socket
1) Apply the rubber packing over the ter-
minals, then insert the socket with cord
into the switch body.
2) Screw the socket fastening screw into
the switch body and tighten it.
Mounting
The QL micro limit switch is manufac-
tured with a very small variation in the
distance between the datum plane and
the operating point. When the operating
point has been accurately established
and the mounting position clearly deter-
mined, two M4 bolts should be used
securely fastening the switch.
with lamp)
Mounting
datum plane
Mounting plate
M4 fastening bolts
Operating position
( O.P. )
Clockwise direction
Related parts for AZ40029
Image
Part Number
Description
Manufacturer
Datasheet
Request
R

Part Number:
Description:
POWER RELAY, 24VDC, 30A, SPST-NO
Manufacturer:
PANASONIC EW
Datasheet:

Part Number:
Description:
POWER RELAY, SPDT, 12VDC, 10A, PC BOARD
Manufacturer:
PANASONIC EW

Part Number:
Description:
POWER RELAY, 24VDC, 5A, SPST-NO, PCB
Manufacturer:
PANASONIC EW
Datasheet:


Part Number:
Description:
SIGNAL RELAY, DPDT, 4.5VDC, 1A, SMD
Manufacturer:
PANASONIC EW
Datasheet:

Part Number:
Description:
SIGNAL RELAY, DPDT, 4.5VDC, 1A, THD
Manufacturer:
PANASONIC EW
Datasheet:

Part Number:
Description:
MINIATURE RELAY, DPDT, 24VDC, 2A, THD
Manufacturer:
PANASONIC EW


Part Number:
Description:
SIGNAL RELAY, DPDT, 5VDC, 2A, PC BOARD
Manufacturer:
PANASONIC EW
Datasheet:
Part Number:
Description:
SIGNAL RELAY, DPDT, 5VDC, 2A, SURFACE MOUNT
Manufacturer:
PANASONIC EW
Datasheet:
Part Number:
Description:
SIGNAL RELAY, DPDT, 5VDC, 2A, PC BOARD
Manufacturer:
PANASONIC EW
Datasheet:


Part Number:
Description:
PHOTOMOS RELAY, 60VDC, 400mA
Manufacturer:
PANASONIC EW
Datasheet:

Part Number:
Description:
PHOTOMOS RELAY, 400V, 150mA
Manufacturer:
PANASONIC EW
Datasheet: