QS18VN6R BANNER ENGINEERING, QS18VN6R Datasheet - Page 5
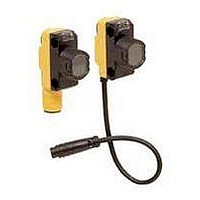
QS18VN6R
Manufacturer Part Number
QS18VN6R
Description
Photoelectric Sensor
Manufacturer
BANNER ENGINEERING
Type
Infraredr
Datasheet
1.QS18VN6FP.pdf
(7 pages)
Specifications of QS18VN6R
Output Current
100mA
Sensor Output
NPN
Supply Voltage Range Dc
10V To 30V
Sensor Input
Optical
Output Type
Transistor
Sensing Range Max
20m
Contact Current Max
100mA
Switch Terminals
Cable
Body Style
Rectangular
Brand/series
World-Beam®
Current, Switching
100 mA
Ip Rating
IP67
Mounting Type
Threaded
Output
NPN, SPDT
Primary Type
Photoelectric
Range, Measurement
20 m
Sensing Mode
Opposed
Technology
Photoelectric
Termination
4-Wire Cable
Voltage, Supply
30 VDC


Unterminated Plastic Fiber Cutting Procedure
Unterminated plastic fibers are designed to be cut by the user to the length required
for the application. To facilitate cutting, a Banner model PFC-1 cutting device is
supplied with the fiber. Cut the fiber as follows:
1) Locate the “control end” of the fiber (the unfinished end). Determine the length of
2) Double-check the fiber length, and close the cutter until the fiber is cut. Using a
3) Gently wipe the cut ends of the fiber with a clean, dry cloth to remove any
Plastic Fiber Installation
A) Unlock the fiber gripper as shown in Figure 2. If 0.25 mm or 0.5 mm core fibers are
B) Gently insert the prepared plastic fiber ends into the ports, as far as they will go.
C) Slide the fiber gripper back to lock, as shown in Figure 2.
Glass Fiber Installation
A) Install the O-ring (supplied with the fiber) on each end, as shown in the drawing.
B) While pressing the fiber ends firmly into the portson the front of the sensor, slide the
fiber required for the application. If using a bifurcated fiber, separate the two halves
of the fiber at least 2" beyond the fiber cutting location. Lift the top (blade) of the
cutter to open the cutting ports. Insert one of the control ends through one of the
cutting ports on the PFC-1 cutter so that the excess fiber protrudes from the back of
the cutter.
different cutting port, cut the second control end to the required length. To ensure a
clean cut each time, do not use a cutting port more than once.
contamination. Do not use solvents or abrasives on any exposed optical fiber.
being used, slide the small fiber adapters onto the fibers, flush with the fiber ends.
U-shaped retaining clip (supplied with the sensor) into the slot in the sensor’s barrel,
until it snaps into place.
NPN (Sinking) Outputs
QS18 Sensors with
bu (3)
bn (1)
bk (4)
wh (2)
Banner Engineering Corp.
bn
bu
www.bannerengineering.com • Tel: 763.544.3164
QS18 Emitters
Load
Load
Load
Load
10-30V dc
10-30V dc
-
+
+
–
•
Minneapolis, U.S.A.
Installing Fibers
PNP (Sourcing) Outputs
QS18 Sensors with
bn (1)
bu (3)
bk (4)
wh (2)
Load
Load
10-30V dc
+
-
Hookups
(Cable Connector Shown)
4-Pin Pico-Style Pin-out
Black Wire
Blue Wire
Figure 1. PFC-1 plastic fiber cutter
Figure 2. Installing plastic fibers
Figure 3. Installing glass fibers
White Wire
Brown Wire
WORLD-BEAM
Use small ports
for fiber sizes:
• 0.25 mm (0.01")
• 0.5 mm (0.02")
B
(supplied with fiber)
A
(Cable Connector Shown)
4-Pin Euro-Style Pin-out
(1) bn
(4) bk
Retaining Clip
Lift to Open Ports
Use large ports
for fiber sizes:
• 0.75 mm (0.03")
• 1.0 mm (0.04")
• 1.5 mm (0.06")
C
P/N 63908 rev. G
Cutting Ports
4-Large
2-Small
®
O-ring
QS18
wh (2)
bu (3)
5
Related parts for QS18VN6R
Image
Part Number
Description
Manufacturer
Datasheet
Request
R

Part Number:
Description:
Photoelectric Sensor
Manufacturer:
BANNER ENGINEERING
Datasheet:

Part Number:
Description:
Photoelectric Sensor
Manufacturer:
BANNER ENGINEERING
Datasheet:

Part Number:
Description:
LEDIR70XD4-XM-81039 MAX INTENS STROBE ONLY NO BANNER MARKS
Manufacturer:
BANNER ENGINEERING
Part Number:
Description:
M18SP6DL-72225 LABELED MOELLER NO BANNER MARKINGS BULK PACK
Manufacturer:
BANNER ENGINEERING
Part Number:
Description:
M18SP6DLQ-72226 LABLED MOELLER NO BANNER MARKINGS BULK PACK
Manufacturer:
BANNER ENGINEERING
Part Number:
Description:
M18SP6L-72223 LABELED MOELLER NO BANNER MARKINGS BULK PACK
Manufacturer:
BANNER ENGINEERING
Part Number:
Description:
M18SP6LQ-72224 LABELED MOELLER NO BANNER MARKINGS BULK PACK
Manufacturer:
BANNER ENGINEERING
Part Number:
Description:
P4D1-77908 P4 DRIVER GENERIC NO BANNER MARKINGS RESALE TO CUSTOMER
Manufacturer:
BANNER ENGINEERING
Part Number:
Description:
Photoelectric Sensor
Manufacturer:
BANNER ENGINEERING
Datasheet:

Part Number:
Description:
Programmable Indicator Light
Manufacturer:
BANNER ENGINEERING
Datasheet:
Part Number:
Description:
INDICATOR LED PANEL 50MM GRN/RED/YEL 30V
Manufacturer:
BANNER ENGINEERING
Datasheet:
Part Number:
Description:
Programmable Indicator Light
Manufacturer:
BANNER ENGINEERING
Datasheet: