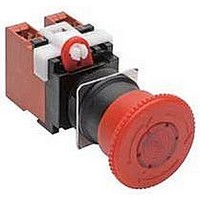
A22ELM12A11 Omron, A22ELM12A11 Datasheet - Page 15

A22ELM12A11
Manufacturer Part Number
A22ELM12A11
Description
SWITCH, EMERGENCY STOP, SPST-NO/NC, 440V
Manufacturer
Omron
Datasheet
1.A22E-M.pdf
(18 pages)
Specifications of A22ELM12A11
Contact Configuration
SPST-1NO / 1NC
Switch Operation
Pushlock Turn Reset
Contact Voltage Ac Nom
440V
Contact Voltage Dc Nom
380V
Contact Current Max
10A
Illumination Color
Red
Assembling the Cap
Installing/Replacing the Lamp
Control Box (Enclosure)
• Insert the protrusion of the Tightening Wrench (A22Z-3905) into the Cap slot and then turn to remove the Cap.
• Insert the Lamp Extractor (A22Z-3901) into the lamp, then rotate the Extractor
The Standard-size Legend Plate Frame can
be mounted.
Mount the Frame as shown in the following
diagram. Mount the Switch in the same way
as for an ordinary panel.
while pressing it.
(1) Mounting the Switch
(1) Installing/Replacing from the Panel Surface
Snap-in Legend Plate
Cap slot Protrusion
Emergency Stop Switch
Place the tip of a screwdriver on the surface
where the cable port hole is to be created
with the cover attached and strike the
screwdriver to punch a hole.
Attempts to punch a hole on the other side
of the case will damage the Box.
(2) Creating a Cable Port Hole
• Grip the indicator with your fingers, then rotate the indicator while pressing it
against the Switch.
1. Insert the connector into the cable port hole in the Box and secure
2. Pass the tightening cap through the cable, insert the cable into the
with the Mounting Ring inside the box.
connector, and tighten the tightening cap to secure the cable.
Mounting
RIng
Inside
Box
(2) Installing/Replacing on the Switch
(3) Securing the Connector Cable
Outside
Rubber washer
Connector
7 to 9 dia.
9 to 11 dia.
Cable diameter
Tightening cap
A22Z-3500-1
A22Z-3500-2
Connector
A22E
Cable
15


