CL143001 Souriau Connection Technology, CL143001 Datasheet - Page 21
CL143001
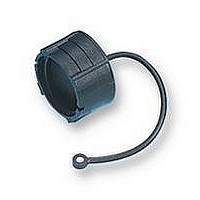
Manufacturer Part Number
CL143001
Description
DUST CAP, SIZE 3
Manufacturer
Souriau Connection Technology
Datasheet
1.CL124021.pdf
(24 pages)
Specifications of CL143001
Connector Shell Size
3
Connector Body Material
Thermoplastic
Svhc
No SVHC (15-Dec-2010)
Colour
Black
Connector Type
Dust Cap & Cover
Flammability
RoHS Compliant
Accessory Type
Dust Cap
Mounting Style
PCB
For Use With
Sealed Connectors


Instruction For Assembly
Insertion and extraction of contacts
Single wires
Contact insertion and extraction is performed without a tool thanks to te retainer plate system.
Insertion
Special case of jacketed cables
1) Locate the first contact and the corresponding cavity.
2) The wire should described a buckle as describe below.
3) Unlock the retainer plate as described above.
4) Fully insert the wired contact in the cavity.
5) Respect the same procedure for the other contacts
6) Once again squeeze the retainer plate flaps and push
forwards : the plate is then locked
1) With the thumb and index finger,
2) Fully insert the wired contact in the
3) Repeat the same procedure for the
4) Once again squeeze the retainer plate
5) The plate can only be pushed backed
squeeze the retainer plate flaps and
pull backwards : the plate is then in
the unlocked position.
cavity.
other contacts.
flaps and push forwards: the plate is
then locked and retains the contacts
(90 N of retention force for contacts of
1.6 mm dia.)
if the contacts are correctly engaged
(backup security)
CLIPPER
Extraction
Special case of jacketed cables
7) Manually fully screw the adaptor and the backshell
Caution : In the sealed version don’t forget the O-ring.
8) Push forwards the cable of 10 mm in the backshell.
9) Fully screw on the backshell with a wrench while
Note : The plate can only be pushed back if the
contacts are correctly engaged (backup- security)
on the connector.
keeping the adaptor with another wrench.
1) With the thumb and index finger,
2) Pull the contact wire: the the contact
3) Repeat the same procedure for the
squeeze the retainer plate flaps and
pull backwards : the plate is then in
the unlocked position.
comes out of the cavity.
other contacts.
21