YB225CWCKW01/CUL-5D-EB NKK Switches, YB225CWCKW01/CUL-5D-EB Datasheet - Page 7
YB225CWCKW01/CUL-5D-EB
Manufacturer Part Number
YB225CWCKW01/CUL-5D-EB
Description
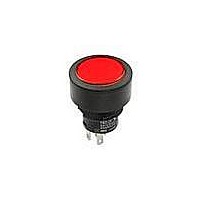
Pushbutton Switches SPDT, Amber LED Yellow/White Lens
Manufacturer
NKK Switches
Type
Panel Seal Pushbuttonsr
Series
YB2r
Datasheet
1.AT3017EB.pdf
(8 pages)
Specifications of YB225CWCKW01/CUL-5D-EB
Contact Form
DPDT - NO / NC
Contact Rating
3 Amps at 125 VoltsAC
Actuator
Plunger, with Cap
Cap Color
Yellow, White
Supply Voltage
125 VoltsAC
Mounting Style
Panel
Terminal Seal
Epoxy
Contact Plating
Silver
Contact Material
Phosphor Bronze
Illumination
Illuminated
Illumination Color
Amber
Flammability Rating
UL 94 V-0
Body Shape
Round
Dielectric Strength
1000 VoltsAC
Features
Black bezel, with UL mark
Housing Material
Polyamide, Glass Fiber Reinforced
Insulation Resistance
200 MOhms
Led Size
T-1 Bi-pin
Mounting Angle
Straight
Operating Force
3 N
Water / Moisture Rating
IP65
Switch Function
ON - (ON)
Termination Style
Solder Lug
Pole Throw Configuration
DPDT
Switch Configuration
ON ON
Actuator Style
Round Button
Current Rating (max)
3A
Illumination Type
Led
Ac Voltage Rating (max)
250VVAC
Dc Voltage Rating (max)
30VVDC
Product Depth (mm)
25mm
Product Length (mm)
25mm
Operating Temp Range
-25C to 50C
Terminal Type
Quick Connect/Solder
Lead Free Status / RoHS Status
Lead free / RoHS Compliant


22mm Panel Seal Pushbuttons
1. Remove knurled
2. Remove bezel and red
3. Install LED.
4. Align tabs (B) on both
LEDs
AT634 & AT636
LED AT628
LEDs AT625G,
AT631B,
AT632F
mounting nut.
o-ring from housing.
There are two o-rings
in this assembly: one is
red, one is orange.
(+)
sides of actuator with
the projections (A) inside
of the housing and push
actuator firmly down to
snap in.
(+)
(+)
(–)
(–)
(–)
D-Flat
D-Flat
Knurled
Mounting Nut
Align D-flat on LED with Part Number
on switch for appropriate polarity and
insert LED into base.
Align D-flat on LED with Part Number
on switch for appropriate polarity and
insert LED into base.
The larger metal part within the LED
represents the cathode (–). Align LED
for appropriate polarity and insert LED
into base.
Cathode (–)
B
Part Number
This Side
Bezel
SENSITIVE DEVICES
SENSITIVE DEVICES
ELECTROSTATIC
ELECTROSTATIC
ATTENTION
ATTENTION
Housing
Actuator
Cathode
Socket (–)
Anode
Socket (+)
A
ASSEMBLY INSTRUCTIONS
Anode (+)
Red O-ring
www.nkk.com
5. Install the red o-ring which
6. Align tab inside of the bezel with keyway on housing and
7. Before installing into panel,
8. Attach mounting nut behind panel and tighten. Make
was removed in step 2 at
the inside bottom of the
bezel.
bring bezel back into its original position.
make sure that the orange
o-ring is present at the back
of the bezel. Align keyway
on bezel with tab in panel
and push switch all the way
into the panel.
sure that bezel and actuator fit properly and that there is
no space between bezel and panel. Do not overtighten.
Mounting torque: 0.785Nm (6.95 lb
Optional socket wrench AT106 available.
AT106 Socket Wrench
Housing
Red
O-ring
Bezel
Knurled
Mounting Nut
Actuator
Keyway
Orange
O-ring
Tab
Series YB2
Back of
Bezel
Panel
•
in) maximum.
Panel
Bezel
Bezel
Red O-ring
Bezel
Keyway
Tab
D121
D
Related parts for YB225CWCKW01/CUL-5D-EB
Image
Part Number
Description
Manufacturer
Datasheet
Request
R

Part Number:
Description:
SWITCH PB DPDT SILVER SLD LUG UL
Manufacturer:
NKK Switches
Datasheet:
Part Number:
Description:
SWITCH PB DPDT BRIGHT RED ILLUM
Manufacturer:
NKK Switches
Datasheet:
Part Number:
Description:
SWITCH PB DPDT BRIGHT AMB ILLUM
Manufacturer:
NKK Switches
Datasheet:
Part Number:
Description:
SWITCH PB DPDT BRIGHT GRN ILLUM
Manufacturer:
NKK Switches
Datasheet:

Part Number:
Description:
Pushbutton Switches SPDT, Amber LED Clear/White Lens
Manufacturer:
NKK Switches
Datasheet:
Part Number:
Description:
Pushbutton Switches SPDT, Red LED Clear/White Lens
Manufacturer:
NKK Switches
Datasheet:
Part Number:
Description:
Pushbutton Switches SPDT, Red LED Red/White Lens
Manufacturer:
NKK Switches
Datasheet:

Part Number:
Description:
Pushbutton Switches
Manufacturer:
NKK Switches
Datasheet:
Part Number:
Description:
Pushbutton Switches
Manufacturer:
NKK Switches
Datasheet:

Part Number:
Description:
SWITCH PB DPDT BRIGHT RED ILLUM
Manufacturer:
NKK Switches
Datasheet:

Part Number:
Description:
SWITCH PB DPDT BRIGHT AMB ILLUM
Manufacturer:
NKK Switches
Datasheet:
Part Number:
Description:
SWITCH PB DPDT BLACK SOLDER RED
Manufacturer:
NKK Switches
Datasheet:
Part Number:
Description:
SWITCH PB DPDT BLACK SOLDER AMB
Manufacturer:
NKK Switches
Datasheet:
Part Number:
Description:
SWITCH PB DPDT BLACK SOLDER GRN
Manufacturer:
NKK Switches
Datasheet:
Part Number:
Description:
SWITCH PB DPDT BLACK SOLDER BLU
Manufacturer:
NKK Switches
Datasheet: