LB16SKW01-6B-JB NKK Switches, LB16SKW01-6B-JB Datasheet - Page 11
LB16SKW01-6B-JB
Manufacturer Part Number
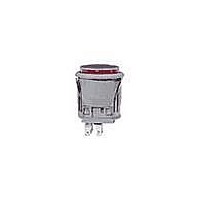
LB16SKW01-6B-JB
Description
SWITCH ILLUM PB SPDT ALT SQ WHT
Manufacturer
NKK Switches
Series
LBr
Type
Illuminatedr
Specifications of LB16SKW01-6B-JB
Circuit
SPDT
Switch Function
On-On
Contact Rating @ Voltage
3A @ 125VAC
Actuator Type
Square Button
Illumination Type, Color
LED, White
Illumination Voltage (nominal)
3.6 VDC
Mounting Type
Panel Mount, Snap-In
Termination Style
Solder, Quick Connect - .110" (2.8mm)
Contact Form
SPDT
Mounting Style
Snap In
Illumination
Illuminated
Illumination Color
White
Contact Rating
3 Amps at 125 Volts, 250 Volts
Contact Plating
Silver
Contact Material
Phosphor Bronze
Actuator
Square
Flammability Rating
UL 94 V-0
Body Length
21.5 mm
Body Shape
Square
Dielectric Strength
1000 Volts
Housing Material
Polyamide, Glass Fiber Reinforced
Insulation Resistance
200 MOhms
Led Size
T-1 Bi-pin
Mounting Angle
Vertical
Operating Force
4.41 N
Supply Voltage
125 Volts, 250 Volts
Pole Throw Configuration
SPDT
Switch Configuration
ON ON
Actuator Style
Square Button
Current Rating (max)
3A
Illumination Type
Led
Ac Voltage Rating (max)
250VVAC
Dc Voltage Rating (max)
30VVDC
Mechanical Life
200000
Product Height (mm)
34mm
Product Depth (mm)
17.8mm
Product Length (mm)
17.8mm
Operating Temp Range
-25C to 50C
Terminal Type
Quick Connect/Solder Lug
Lead Free Status / RoHS Status
Lead free / RoHS Compliant


NKK Switches • email: sales@nkkswitches.com • Phone (480) 991-0942 • Fax (480) 998-1435 • www.nkkswitches.com
Align projections on lamp with
grooves (B) in holder when
inserting lamp. To correctly join
the lamp holder and cap base,
match the cut corners (A).
Incandescent & Neon Lamps
Match projection (C) on cap
assembly with groove (C)
inside switch. Lamp terminals
will then be aligned correctly
with lamp socket.
Snap-in clip holds all switches firmly
in place.
To mount round
switch, match
the antirotation
projection on
switch with
guide cut in
panel. Snap
into panel
cutout.
AT607 & AT607N
C
Square
Snap-in Mount
C
Projection
Panel
B
B
A
For panel seal models,
Bright LED must first be
inserted into the lamp
socket which is built into
the switch. The cap can
then be placed on the
switch.
Panel Seal Models
Match clip on cap assembly with receptacle inside
switch. Lamp terminals will then be aligned correctly
with lamp socket.
ASSEMBLY INSTRUCTIONS
Insert switch from the
front of the panel with
the o-ring between the
built-in bezel and the
panel. Install mounting
nut AT075 (supplied with
switch) from the rear of
the panel.
Overtightening mounting
nut may damage the
switch housing.
Lamp Installation & LED Orientation
Installation & Maintenance
Bushing Mount
Bright LED AT627
Switch & Cap Assembly
Panel Seal
Round & Rectangular
Standard Size Pushbuttons
For snap-in models,
Bright LED must be
inserted into the cap
first. Align cut corners
Snap-in Models
C
(C) when
inserting
the LED.
O-ring
Mounting Nut
Bezel
LED
Panel
Cap Extractor
With Lamps AT607, AT607N, and
LEDs AT614, AT625, AT631, AT632:
Match projection on cap assembly with
notch inside switch. Lamp terminals
will then be aligned correctly with lamp
socket.
Align D-flat on LED with flat (B) in
holder when inserting the LED.
To correctly join the lamp holder and
cap base, match the cut corners (A).
AT109
Projection
Actuator must be in UP position.
Pull off cap with cap extractor
AT109.
Replace lamp and reassemble as
shown above.
Notch
Bright & Super Bright LEDs
AT625, AT631, AT632,
Cut Corner
Panel Seal
Lamp Replacement
Series LB
AT635
LED
Sensitive Devices
Socket Wrench
D Flat
Attention
Rubber Seal
Electrostatic
A
AT112
Projection
03-07
B
Related parts for LB16SKW01-6B-JB
Image
Part Number
Description
Manufacturer
Datasheet
Request
R

Part Number:
Description:
SW PB SPDT ALT SQ SILV SLD MNT
Manufacturer:
NKK Switches
Datasheet:

Part Number:
Description:
SW PB ILLUM SPDT ALT SQ GRN SLD
Manufacturer:
NKK Switches
Datasheet:
Part Number:
Description:
SW PB ILLUM SPDT ALT SQ WHT SLD
Manufacturer:
NKK Switches
Datasheet:
Part Number:
Description:
SWITCH ILLUM PB SPDT ALT SQ 12V
Manufacturer:
NKK Switches
Datasheet:
Part Number:
Description:
SWITCH ILLUM PB SPDT ALT SQ 12V
Manufacturer:
NKK Switches
Datasheet:
Part Number:
Description:
SW PB ILLUM SPDT ALT SQ GRN SLD
Manufacturer:
NKK Switches
Datasheet:
Part Number:
Description:
SW PB ILLUM SPDT ALT SQ R/G SLD
Manufacturer:
NKK Switches
Datasheet:
Part Number:
Description:
SW PB ILLUM SPDT ALT SQ WHT SLD
Manufacturer:
NKK Switches
Datasheet:
Part Number:
Description:
SW PB ILLUM SPDT ALT SQ RED SLD
Manufacturer:
NKK Switches
Datasheet:
Part Number:
Description:
SW PB ILLUM SPDT ALT SQ RED SLD
Manufacturer:
NKK Switches
Datasheet:
Part Number:
Description:
SW PB ILLUM SPDT ALT SQ RED SLD
Manufacturer:
NKK Switches
Datasheet:
Part Number:
Description:
SW PB ILLUM SPDT ALT SQ GRN SLD
Manufacturer:
NKK Switches
Datasheet:
Part Number:
Description:
Pushbutton Switches SPDT ON-ON GREEN LED
Manufacturer:
NKK Switches

Part Number:
Description:
SWITCH PB ILLUM SPDT ALT GRN SLD
Manufacturer:
NKK Switches
Datasheet:

Part Number:
Description:
SWITCH PB ILLUM SPDT ALT AMB SLD
Manufacturer:
NKK Switches
Datasheet: