E3T-ST12 Omron, E3T-ST12 Datasheet - Page 11
E3T-ST12
Manufacturer Part Number
E3T-ST12
Description
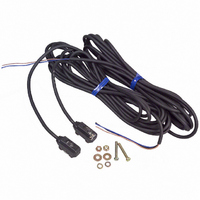
OPTO SENSOR XMITTER/RCVR 1METER
Manufacturer
Omron
Series
E3Tr
Type
Subminiature Photoelectric Sensorr
Specifications of E3T-ST12
Sensing Distance
39.370" (1m)
Sensing Method
Through-Beam
Output Configuration
NPN - Open Collector/Dark-ON
Mounting Type
Bracket Mount
Current - Supply
30mA
Voltage - Supply
12 V ~ 24 V
Response Time
1ms
Package / Case
Module, Pre-Wired
Features
Offered in both flat and rectangular
Light Source
Red LED
Connection
Pre-Leaded
Output Current
50mA
Sensor Output
NPN DO
Supply Voltage Range Dc
12V To 24V
Switch Terminals
Cable
Sensor Housing
Rectangular
Sensor Input
Optical
Output Type
Transistor
Sensing Range Max
1m
Sensing Mode
Through-Beam
Rohs Compliant
Yes
Lead Free Status / RoHS Status
Contains lead / RoHS compliant by exemption
Lead Free Status / RoHS Status
Lead free / RoHS Compliant, Contains lead / RoHS compliant by exemption
Other names
E3TST12
OR592
OR592
Available stocks
Company
Part Number
Manufacturer
Quantity
Price
Company:

Part Number:
E3T-ST12
Manufacturer:
EVERLIGHT
Quantity:
42 760


J SLITS/APERTURES (ORDER SEPARATELY)
Adjustable Aperture
E39-E10 (Use with E3T-ST1j)
With the Adjustable Aperture
Unit in Place
E39-R37 Reflector
E39-S63 (Use with E3T-ST1j)
E3T
Material:
0.2-mm-thick stainless steel
(301 Stainless)
(0.29)
7.4
Optical axis
1.0±0.05 dia.
0.5±0.05 dia.
(0.29)
7.4
(0.50)
12.6
2 dia.
Two, 2.2 dia.
Two 3.1 dia
(0.54)
13.7
(0.59)
15.1
301 Stainless steel
Shown with Sensor
Notch
(0.74)
18.7
Note: Align the notch direction of
(0.29)
7.4
the slit when installing on
the Emitter and Receiver.
Note: A reflector and a stainless steel mounting
(0.38)
Use of E39-E10 Adjustable Aperture
(Example Dark-ON: E3T-ST12/ST14)
9.7
For Dark-ON:
1. Mount the unit on the receiver.
2. Set the adjuster of the Unit to Max (factory setting is
3. Adjust the optical axis (align) and tighten mounting
4. Place a target between emitter and receiver and
5. Remove the target and confirm that the operation
Note: For Light-ON, adjustment is similar, except that
(At Min.)
at Max).
hardware.
gradually turn the adjuster counterclockwise toward
the Min side. Stop turning the adjuster when the op-
eration indicator and stability indicator (green) turn
ON.
indicator is OFF and the stability indicator (green) is
ON.
plate are supplied together as a set.
indicators would operate in opposite manner as
with Dark-ON.
Stainless steel
mounting plate 0.5
(0.91)
23
(At Center)
E39-S64 (Use with E3T-FT1j)
(0.48)
Reflector
0.6 (with adhesive)
12.3
0.5 dia.
1 dia.
(At Max.)
(0.16)
4.1
Indicator
Adjuster
E3T
11
Related parts for E3T-ST12
Image
Part Number
Description
Manufacturer
Datasheet
Request
R

Part Number:
Description:
Photoelectric Sensors - Industrial E3T-ST Side View Thr ough-Beam
Manufacturer:
Omron
Datasheet:

Part Number:
Description:
PHOTO MINI S/V THRU PNP LO
Manufacturer:
Omron
Datasheet:
Part Number:
Description:
PHOTO MINI S/V THRU PNP DO
Manufacturer:
Omron
Datasheet:
Part Number:
Description:
Industrial Photoelectric Sensors Photo Mini S/V Conve PNP LO
Manufacturer:
Omron
Datasheet:
Part Number:
Description:
PHOTO MINI S/V CONVER PNP LO
Manufacturer:
Omron
Datasheet:
Part Number:
Description:
Photoelectric Sensors - Industrial PHOTO MINI S/V CONVER PNP DO
Manufacturer:
Omron
Datasheet:
Part Number:
Description:
PHOTO MINI S/V CONVER PNP DO
Manufacturer:
Omron
Datasheet:
Part Number:
Description:
PHOTO MINI S/V CONVER PNP LO
Manufacturer:
Omron
Datasheet:
Part Number:
Description:
PHOTO MINI S/V CONVER PNP DO
Manufacturer:
Omron
Datasheet:

Part Number:
Description:
G6S-2GLow Signal Relay
Manufacturer:
Omron Corporation
Datasheet:
Part Number:
Description:
Compact, Low-cost, SSR Switching 5 to 20 A
Manufacturer:
Omron Corporation
Datasheet:
Part Number:
Description:
Manufacturer:
Omron Corporation
Datasheet: