DV164136 Microchip Technology, DV164136 Datasheet - Page 21
DV164136
Manufacturer Part Number
DV164136
Description
DEVELOPMENT KIT FOR PIC18
Manufacturer
Microchip Technology
Series
PIC®r
Type
MCUr
Datasheets
1.DM183032.pdf
(38 pages)
2.DV164136.pdf
(448 pages)
3.DV164136.pdf
(6 pages)
4.DV164136.pdf
(446 pages)
5.DV164136.pdf
(4 pages)
6.DV164136.pdf
(18 pages)
Specifications of DV164136
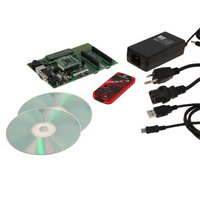
Contents
Board, Cables, CDs, PICkit™ 3 Programmer, Power Supply
Processor To Be Evaluated
PIC18F8722, PIC18F87J11
Interface Type
RS-232, USB
Operating Supply Voltage
3.3 V, 5 V
Silicon Manufacturer
Microchip
Core Architecture
PIC
Core Sub-architecture
PIC18
Silicon Core Number
PIC18F
Silicon Family Name
PIC18F8xxx
Kit Contents
PIC18 Exp Brd PICkit 3 Cable CD PSU
Lead Free Status / RoHS Status
Lead free / RoHS Compliant
For Use With/related Products
PIC18F8722, PIC18F87J11
Lead Free Status / Rohs Status
Lead free / RoHS Compliant
Available stocks
Company
Part Number
Manufacturer
Quantity
Price
Company:

Part Number:
DV164136
Manufacturer:
MICROCHIP
Quantity:
12 000


© 2008 Microchip Technology Inc.
2.4.2
This section describes how to program the PICDEM PIC18 Explorer Demonstration
Board using the MPLAB
Hex code on the compact disc in the PICDEM PIC18 Explorer Demonstration Board’s Kit.
2.4.2.1
To program the PIC18F8722:
1. Launch the MPLAB IDE application and select Configure>Select
2. To start the programmer, select Programmer>Select Programmer> ICD2.
3. To open the Hex code file, select File>Import>Open and select
4. Connect the J4 jumper to Main (main controller), as shown in Figure 2-7.
FIGURE 2-7:
5. Move the S4 switch to PIC MCU, as described in “Using the Board As Is” on
To program the PIC18F87J11 on the PIM:
1. Attach the PIM to the demonstration board.
2. Move the S4 switch to ICE.
3. Launch the MPLAB IDE application and select Configure>Select
4. To start the programmer, select Programmer>Select Programmer>ICD2.
5. To open the Hex code file, select File>Import>Open and select
6. Connect the J4 jumper to Main (main controller), as shown in Figure 2-7.
Device>18F8722.
CD/Hex/18F8722/Demo8722.hex.
page 10.
Device>18F87J11.
CD/Hex/18F87J11/Demo87J11.hex.
Note:
Loading the Program
REPROGRAMMING WITH THE COMPACT DISC SAMPLE CODE
Jumper Location
Both steps 1 and 2 are described in “Attaching the PIM” on page 13.
J4 JUMPER AND ‘MAIN’ SETTING
®
Integrated Development Environment (IDE) and the sample
J4 Jumper
Getting Started
Jumper Setting
USB
J4
Main
DS51721B-page 17
Related parts for DV164136
Image
Part Number
Description
Manufacturer
Datasheet
Request
R

Part Number:
Description:
Manufacturer:
Microchip Technology Inc.
Datasheet:
Part Number:
Description:
Manufacturer:
Microchip Technology Inc.
Datasheet:
Part Number:
Description:
Manufacturer:
Microchip Technology Inc.
Datasheet:
Part Number:
Description:
Manufacturer:
Microchip Technology Inc.
Datasheet:
Part Number:
Description:
Manufacturer:
Microchip Technology Inc.
Datasheet:
Part Number:
Description:
Manufacturer:
Microchip Technology Inc.
Datasheet:
Part Number:
Description:
Manufacturer:
Microchip Technology Inc.
Datasheet:
Part Number:
Description:
Manufacturer:
Microchip Technology Inc.
Datasheet: