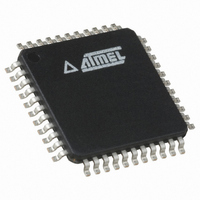
ATMEGA64RZAPV-10AU Atmel, ATMEGA64RZAPV-10AU Datasheet - Page 11

ATMEGA64RZAPV-10AU
Manufacturer Part Number
ATMEGA64RZAPV-10AU
Description
BUNDLE ATMEGA644P/AT86RF230 TQFP
Manufacturer
Atmel
Series
ATMEGAr
Datasheet
1.ATMEGA64RZAPV-10MU.pdf
(21 pages)
Specifications of ATMEGA64RZAPV-10AU
Frequency
2.4GHz
Modulation Or Protocol
802.15.4 Zigbee
Power - Output
3dBm
Sensitivity
-101dBm
Voltage - Supply
1.8 V ~ 3.6 V
Data Interface
PCB, Surface Mount
Memory Size
64kB Flash, 2kB EEPROM, 4kB RAM
Antenna Connector
PCB, Surface Mount
Package / Case
44-TQFP, 44-VQFP
Wireless Frequency
2.4 GHz
Interface Type
SPI, USART
Output Power
3 dBm
For Use With
ATSTK600-TQFP32 - STK600 SOCKET/ADAPTER 32-TQFP770-1007 - ISP 4PORT ATMEL AVR MCU SPI/JTAG770-1005 - ISP 4PORT FOR ATMEL AVR MCU JTAG770-1004 - ISP 4PORT FOR ATMEL AVR MCU SPIATAVRISP2 - PROGRAMMER AVR IN SYSTEMATJTAGICE2 - AVR ON-CHIP D-BUG SYSTEMATSTK500 - PROGRAMMER AVR STARTER KIT
Lead Free Status / RoHS Status
Lead free / RoHS Compliant
Operating Temperature
-
Applications
-
Data Rate - Maximum
-
Current - Transmitting
-
Current - Receiving
-
Lead Free Status / Rohs Status
Lead free / RoHS Compliant
For Use With/related Products
ATmega64
5.2 Programming the ATmega1281
6 Running the Evaluation Application
8051A-AVR-11/06
The precompiled firmware used in the following subsection can be found in the “bin”
folder of the .zip file accompanying this document.
1. Connect a serial cable to the connector marked RS232CTRL on the STK500 to a
2. Apply power to the STK500 by moving the power switch toward the edge of the
3. Start AVR Studio and press the “Cancel” button in the Welcome dialog window.
4. From the Tools menu, select “Program AVR” and “Connect…”.
5. Select STK500 or AVRISP as platform and then press “Connect…”. Verify that a
6. Open the “Program” tab. Select ATmega1281 from the Device pull down menu.
7. Select the “Fuses” tab and ensure that the Fuses are set as listed in Table 5-1:
Table 5-1. ATmega1281 Fuse Settings
8. Go back to the “Program” tab. Program the flash of the ATmega1281 with the
9. Program the EEPROM of the ATmega1281 with the .hex file generated in
10. Close the STK500 window.
As mentioned in the introduction of this document an evaluation application is
available as a part of this application note. This is a peer-to-peer chat application,
where two RZ502 top modules are used to send messages back and forth. Figure 6-1
gives an overview of the evaluation application and its components from a system
point of view. The reminder of this section describes two different ways to interface
with the evaluation application.
Brown-out detection disabled
Preserve EEPROM
Boot Flash section size=4096 words
Divide clock by 8 internally
Int. RC Osc.;Start-up time: 6CK + 65 ms
COM port on the PC.
board.
dialog named “STK500 with STK501 top module” appears.
“bin\AVR414_evaluation_application.hex” file found in the “bin” folder.
subsection 5.1.
Fuse Name
Not Checked
Checked
Checked
Checked
Checked
Setting
This way the user only needs to
program the EEPROM once.
Will divide the clock by 8. This
will corrupt the MAC execution.
Comment
AVR414
11


